


Creating a Custom Shape Around Your Graphics
It’s a fairly simple process. It combines duplicating layers and adding an offset path in Adobe Illustrator to create the shape around your designs. It may seem not very safe at first for beginners, but by following the steps below you’ll be on your way to adding custom shapes for any raster or vector graphic.
Follow these steps using other graphic editing software, but we will show the steps in Adobe Illustrator for ease of use and to create a vector cut path (custom shape).
First, you will want to design your artwork. You can create your graphic designs in raster or vector format. Once designs have been finalized proceed to the steps below.
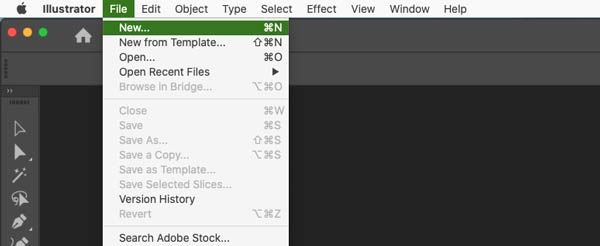
Step 1: Open a new file in Adobe Illustrator
Create a new file (CMD+N mac or CTR+N pc) in Adobe Illustrator.
Step 2: Open settings
Open legacy settings by clicking on more settings. We find that it is easier to set your document settings in this modal window.
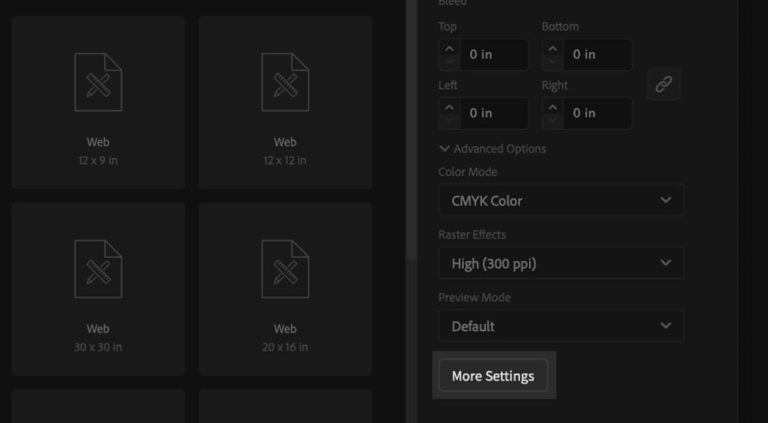
Step 3: Adjust project parameters
Choose units for your artboard. If you are designing to a particular size (in most cases) select inches. If you want to create your file in millimeters or centimeters that is fine we can make the final conversion on our end for print.
- Input the size for your project artboard (can be adjusted later if you are uncertain)
- Select units (inches)
- Add document bleed. We typically use .25” or .375” of bleed on each side to allow for some breathing room around your graphics.
- Select CMYK color mode
- Raster effects assigned to High 300 ppi

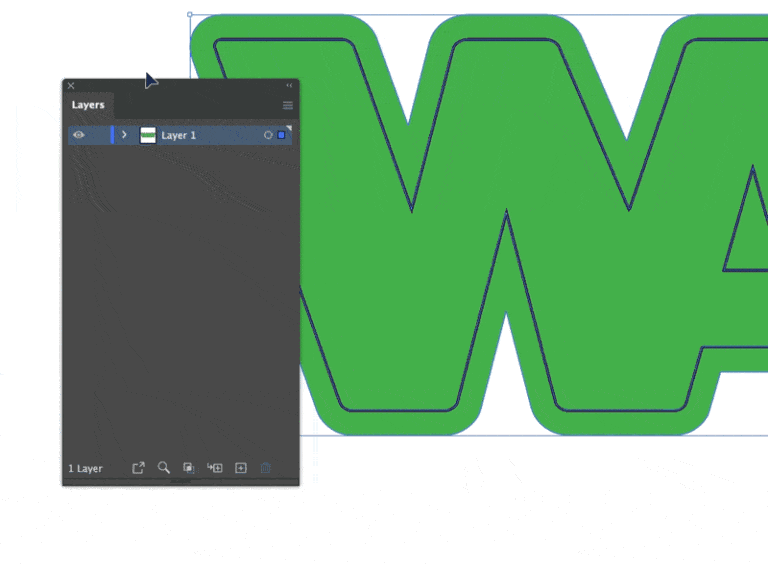
Step 4: Create or paste existing artwork
Create your design from scratch or import/paste your artwork into the current artboard.
Once your graphic objects have been finalized group them all together and rename the layer to “artwork”
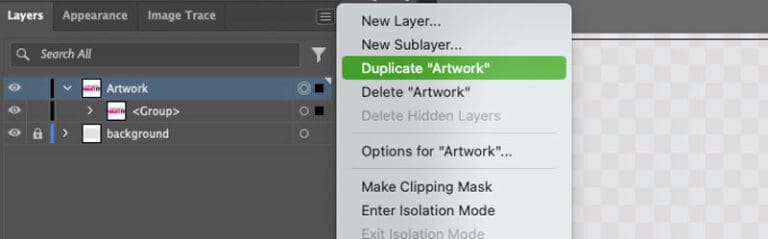
Step 5: Create shape layer by duplicating artwork layer
You will need to duplicate your artwork layer to apply an effect to that will create your shape.
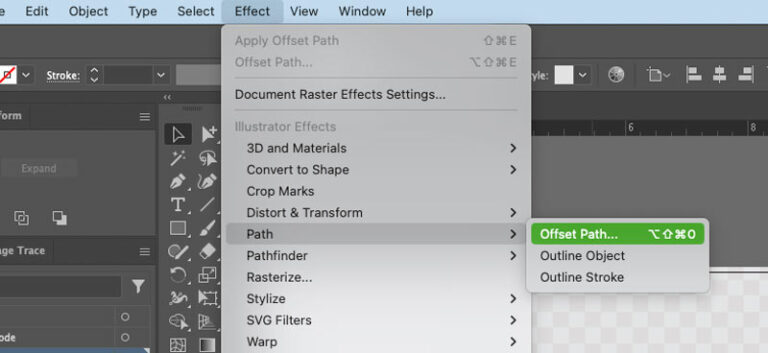
Step 6: Apply Offset Path Effect
Go to the top menu and choose Effect > Path > Offset Path.
Adjust the Offset Path Settings:
In the Offset Path dialog box, enter the desired offset value. Positive values will create an outline outside the original shape, while negative values will create an outline inside the original shape.
Choose the “Joins” type (Miter, Round, or Bevel) based on the kind of corners you want for your outline.
Click OK to apply the effect.
Modify the Outline:
The outline will be created as a new path. You can further modify it using the Direct Selection Tool (A) to adjust anchor points or the Pen Tool (P) to add or remove points.
Change the Stroke and Fill:
If needed, you can change the stroke and fill of the new outline path by selecting it and adjusting the Stroke and Fill colors in the toolbar.
Ungroup if Necessary:
If the new path is grouped with the original object, you might need to ungroup them. Select the objects and go to Object > Ungroup.
Final Adjustments:
Make any final adjustments to your design to ensure the outline looks as desired.
By following these steps, you can create a custom outline shape around your vector graphics in Adobe Illustrator using the Offset Path effect.