


Ways to Create a Print-Ready Graphic Design for Custom Printing
In today’s competitive business landscape, marketing managers are constantly seeking innovative ways to make their brands stand out. One effective strategy is custom printing, which allows businesses to create unique and eye-catching designs for various promotional materials.
However, creating print-ready graphic designs can be a challenging task. In this blog post, we will explore practical ways to ensure your designs are print-ready and optimized for custom printing.
1. Designing for Specific Product Types
Certain products on our website require them to be set up in different formats. More information can be found here about our accepted file types based on the product type described below.
We offer wide-format digital printing, which is highly flexible and capable of producing full-color prints with few limitations, making it ideal for projects like vehicle wraps, wall & window graphics, and banners.
Custom Stickers, Banners, and Sign Products


Custom shape stickers and general one-piece sign items have flexible resolution requirements based on the print size. They can be in either pixel or vector format, but vector is always recommended if possible.
Products that are printed on white material offer the most flexibility. For clear vinyl items, using high-resolution PNG or vector files (vector preferred) is essential to correctly assign the white ink base layer. This ensures vibrant colors and optimal opacity.
Transfer Stickers


Transfer stickers require vector artwork and do not support effects, shadows, or photographic elements. For more detailed guidelines, refer to transfer sticker requirements.
2. Choose the Right Design Software
Using professional design software is fundamental for creating print-ready designs. Software like Adobe Illustrator, Photoshop, or InDesign provide the advanced features necessary for high-quality print design. These tools offer the flexibility to handle various file formats and ensure precise control over elements like color and typography.
If you don’t have this type of software and use online editors like Canva, you can still create these designs. However, exporting them in the required formats may require a paid subscription.
Some design programs can handle both raster and vector graphics, while others are made for just one type.
Vector vs. Raster Graphics
Vector graphics, created in software like Illustrator, are ideal for print because they are resolution-independent, meaning they can be scaled to any size without losing clarity. This makes them perfect for projects like large banners or small stickers.
List of vector graphic file types:
- AI (Adobe Illustrator)
- EPS (Encapsulated PostScript)
- PDF (Portable Document Format)
- SVG (Scalable Vector Graphics)
Raster or pixel-based graphics, created in software like Adobe Photoshop. Unlike vector graphics, raster images are resolution-dependent, meaning their quality is determined by the number of pixels per inch (ppi) in the file. For print, it’s essential to work at a resolution of at least 150-300 ppi to ensure sharpness and clarity.
Raster graphics are ideal for digital art or photography projects with rich, complex effects that are not achievable in vector editing software. For certain design styles, vector graphics may not be a possibility. So, you must make sure you are setting up your graphics with the proper dpi/ppi for your particular project. Make sure it will print with the desired print resolution for its size and application.
3. RGB vs. CMYK Color Modes
Print devices operate in CMYK color mode, whereas digital screens display colors in RGB. Designs created in RGB may appear differently when printed due to the color conversion process.
Always create your design in CMYK or convert it before submission. Understanding the difference between these color modes can help you manage color expectations and achieve consistent results. Learn more about color shift.
4. Adding a Custom Cut Path for Designs
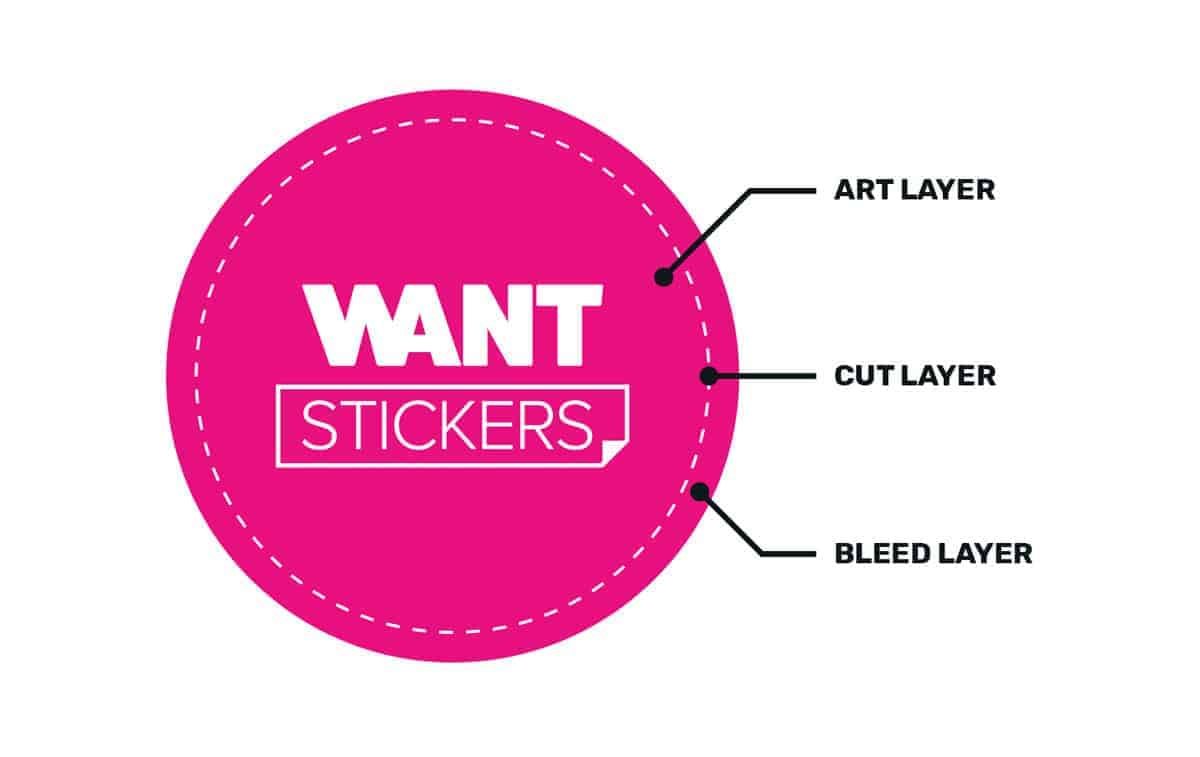
For custom shape items, you need to define a cut path in your design file. This can be done by outlining the desired shape with a distinct color on its own layer and labeling it appropriately (e.g., “Cut Path”). Check out this guide on indicating a cut path for step-by-step instructions.
If you are unable to add a custom cut path to your designs, you may select the custom shape option on the product page. We will create a custom shape for you.

5. The Importance of Using Bleed in Your Designs
Bleed ensures that your artwork extends beyond the cut path or trim area, preventing unwanted white borders or uneven edges after cutting. We recommend at least 0.125 inches of bleed to all sides of your design. This precaution ensures a professional finish, even with minor cutting variations.
If you are unable to add bleed to your designs, you may upload your current design and we will add the bleed for you during the proofing process.
6. Pay Attention to Typography
Typography significantly influences the readability and aesthetic appeal of your design. For small prints like business cards or stickers, use a minimum font size of 6 pt to maintain legibility. Convert all text to outlines or embed fonts to avoid substitution issues during printing. Proper spacing, alignment, and font hierarchy are also crucial for polished results.
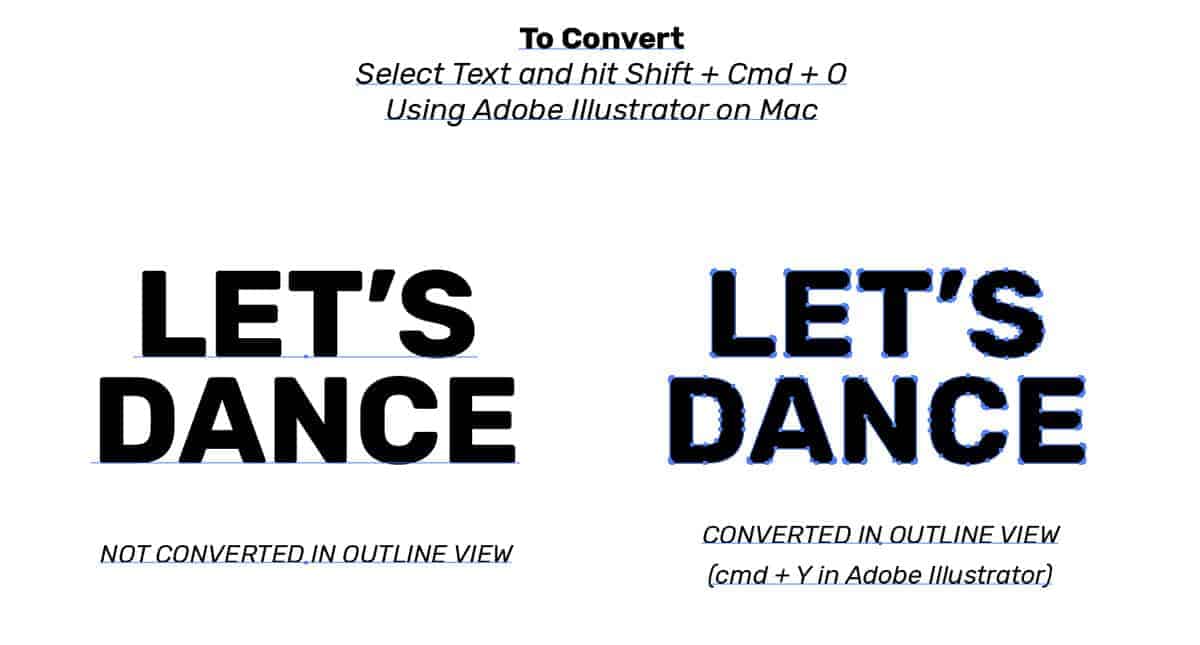
7. Convert Your Fonts to Outlines or Shapes
Converting fonts or text to outlines is a vital step in preparing your design for printing. This process turns your text into vector shapes, ensuring that the appearance of the fonts remains consistent, even if the printer doesn’t have the specific font files installed.
By outlining your text, you eliminate the risk of font substitution or formatting issues during production. This step is especially important for custom designs and helps maintain the integrity of your text across all printed materials.
On top of converting fonts to shapes, it is important to also expand your vector shapes if you have strokes or other effects that may be affected when your design is scaled to a different size.
Always save a copy of your original file before converting to outlines, as the text will no longer be editable once outlined.
8. Make Sure You Are Using Rich Black
When designing for print, using “rich black” ensures deep, vibrant black tones instead of dull or washed-out results.
Unlike standard black (100% K), rich black is created by combining all four CMYK colors in specific percentages—typically 60% Cyan, 40% Magenta, 40% Yellow, and 100% Black. This method is ideal for large areas of black, such as backgrounds or bold text, providing a richer and more professional appearance.
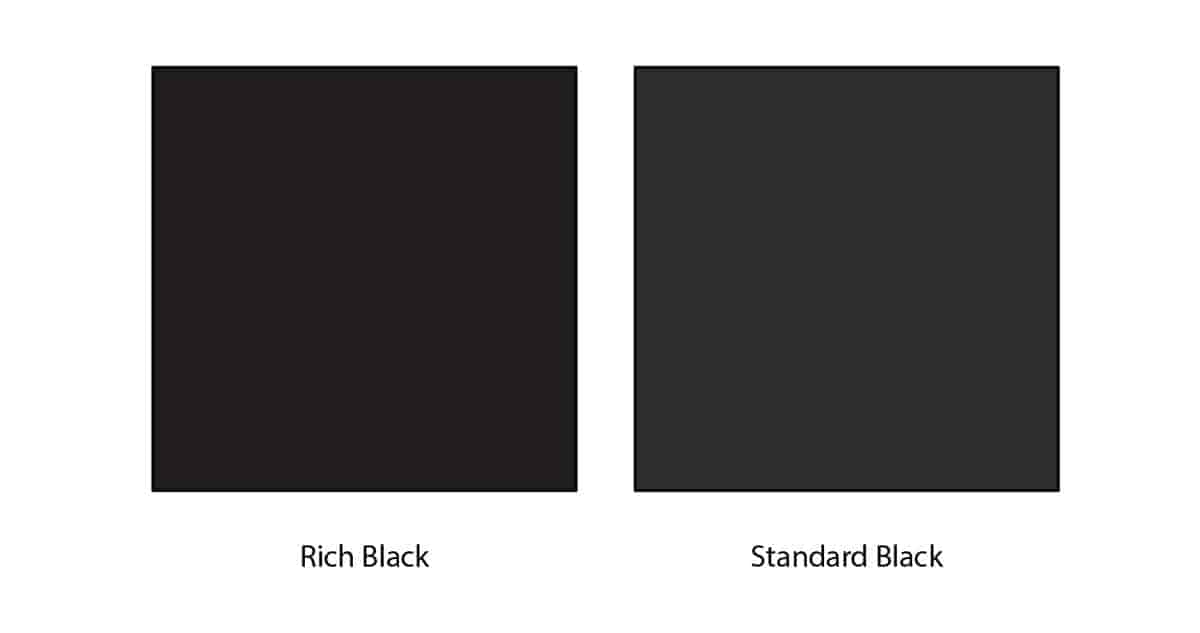
However, for small text or thin lines, it’s best to stick with standard black to avoid potential pooling issues during printing. Which can make some very fine lines/strokes a little blurry.
Understanding when and how to use rich black enhances the visual impact of your printed designs.
9. Linked or Embedded Graphics in Your Design
When incorporating images or graphics into your design, it’s crucial to decide between linking or embedding your graphics or images.
Linked files keep the design file size smaller by referencing external images, but they require all linked files to be included when sending the final design to the printer.
Embedding places the image directly within the design file, ensuring all elements are self-contained, but it can increase the file size significantly. While both methods have their advantages, embedding graphics eliminates the risk of missing files during submission, ensuring a seamless production process.
For certain projects, we will accept “packaged” designs. That contains subfolders of your linked graphics and fonts. Contact us prior to ordering for us to review your packaged files.
Understanding this distinction helps streamline the file preparation and printing process.
10. Test Your Design
Before finalizing your design, test it thoroughly. Print a sample copy on a standard office printer to check for alignment, color accuracy, and composition. Use your design software’s print preview feature to identify potential issues.
Additionally, we offer physical proof services for your design, allowing you to review and approve a test print before full production. This step ensures your final product meets your expectations, but may not always suited for your project because it will delay the turnaround time for your order during the review process. Typically, this is reserved for large orders.
Conclusion
Creating print-ready graphic designs for custom printing requires attention to detail and adherence to technical guidelines. By understanding file types, working with the right software, optimizing images, incorporating bleed, refining typography, and testing your design, you can produce stunning printed materials that effectively represent your brand.
For more detailed guidance on preparing your files, visit our File Setup and Artwork category in our help center. Our team is here to help! You may always send us a message to review your files prior to placing an order!